Showing posts with label recipe. Show all posts

Tuesday, April 2, 2013

Pink Lemonade Pie

This was a recipe one of my Facebook friends posted.  It sounded so good and easy I thought I'd try it.  It was easy and good!

I'm sure if you wanted to add a layer of fresh berries in the middle it would turn out well too. This seems to be one of those easy-peazy pies that you can play around with to make your own variations.  Enjoy!


PINK LEMONADE PIE

Ingredients
  • 1 (8 oz.) package cream cheese, softened
  • 1 (14 oz.) can Eagle Brand® Sweetened Condensed Milk
  • 1 (6 oz.) can frozen pink lemonade from concentrate, thawed
  • Few drops red food coloring
  • 1 (4 oz.) container frozen whipped topping, thawed
  • 1 (8 or 9-inch) baked pie crust
  • 1/2 cup coconut, tinted pink
  • Instructions
  • BEAT cream cheese in large bowl until fluffy. Gradually beat in sweetened condensed milk, lemonade concentrate and food color, if desired.
  • FOLD in whipped topping. Pour into prepared pie crust. Chill 4 hours or until set. Garnish with coconut.

Tuesday, March 19, 2013

Double Cream Blueberry Pie

We have long been fans of Marie Callender's Double Cream Blueberry Pie.  Unfortunately the nearest restaurant is in Eugene, about 3 or so hours away.  So of course the next best thing is to do a little internet research and find the recipe or something close.  I think I found something really, really close.

I found a recipe on a Taste of Home/Community Forum site (http://community.tasteofhome.com/community_forums/f/30/t/210773.aspx).

Here is the recipe I copied from that site from a forum member named "Hollyga":

Marie Callenders Sour Cream and Blueberry Pie


Notes:
This was the last and final pie recipe from our visit at Marie Callenders. One thing we noticed right off was that the pie had apples in it. It wasn't just blueberries.

Ingredients:
1 9" Baked and Cooled Pie Shell

Blueberry Apple Filling

1 15oz Can Blueberries in Heavy Syrup Drained reserve juice in one bowl and 
berries in another bowl
1 1/2 C water
1 C Apple's (delicious) Pealed, Cored, and Diced, Large Pea Size
1/4 tsp. Salt
3 Tbsp. Cornstarch
1/4 C Water
3/4 C Sugar
1/2 tsp. Lemon Juice
1/4 tsp. Cinnamon


Preparation:
In a 2 quart saucepan combine diced apples with water, sugar, and salt at medium temperature until the apples are done but not mushy, about 10 minutes. While apples are cooking mix cornstarch with 1/4 cup water and dissolve cornstarch. When apples are done add lemon juice and berry juice, cook and stir until blended. While stirring on medium heat add dissolved cornstarch slowly and stir constantly until thickened. Add berries and cinnamon mix through. Remove from heat and cool before placing into cooled prepared pie shell. Refrigerate until thoroughly chilled.

Sour Cream Topping

1C. Sour Cream
1 tsp. Vanilla
1/2 C Sugar
1 Tbsp. Cream Cheese
1/2 tsp. Knox Gelatin
2 Tbsp. Cold Water

Dissolve gelatin in 2 Tbsp. water and set aside. Mix the sour cream, sugar, cream cheese, dash of salt in a pan warm on low heat until sugar in dissolved and everything is mixed thoroughly, stir and watch that mixture does not burn or dry out. When all is smooth and blended add vanilla and stir. Then gradually add gelatin until mixture has a firm consistency of soft pudding, remove from heat. Sour Cream topping may be smoothed over Blueberries while luke warm and chill. May be garnished with whipped cream.

If you are on a tight schedule you may use Blueberry Pie Filling but this will taste a much sweeter.


I made a few changes because I didn't have the can of blueberries called for in the recipe.  Just for your info I used 4 cups of frozen blueberries and one Golden Delicious apple. I added the blueberries at the same time as the apples. I didn't add any extra water or juice to make up for the canned berry juice.

I had enough filling for 2+ pies so I ended up making another pie crust and doubling the sour cream topping. 

For the whipped cream I made a "stabilized whipped cream frosting" which works really well. It tends to hold up much better than regular whipped cream, which has a tendency to "melt", or disintigrate, even in the fridge.

Here's the recipe for that, again copied straight off the internet:

Stabilized Whipped Cream Frosting
     --adapted from cdkitchen
  • 1/2 tsp unflavored gelatin powder
  • 2 tbsp cold water
  • 1 cup whipping cream (regular or heavy--I always use heavy cream)
  • 2 tbsp confectioner's sugar
1. Sprinkle gelatin over cold water in small bowl to soften. 
stabilized+whipped+cream+gelatin+mix.jpg
Gelatin mixture--I let this get too firm in the fridge, but it worked.
2. Scald 2 tablespoon of the cream; pour over gelatin, stirring till dissolved.
3. Refrigerate until consistency of unbeaten egg white. (This takes about 10-15 minutes.) Then, with a whisk, beat until smooth. 
4. In a stand mixer with a whip attachment, or with a hand beater, whip remaining cream and sugar; whip in the smoothed gelatin mixture, stopping to scrape the bowl twice.

Fills and frosts top of 2 8" or 9" cake layers; or frosts 10" angel
cake or spongecake. Tops one standard 9" pie with some left over to enjoy from a spoon.  Stands up well, even in warm weather. Keep leftover frosting and any product topped with it in the refrigerator until ready to eat.


The pie turned out to be a big hit and we all agreed it tasted very close to the original Marie Callender's pie.

This recipe is a keeper for our family!

Monday, April 30, 2012

Yesterday's Day Trip

Yesterday we took a break from all the tractoring and slash burning and went for a drive. We were looking for a horse camp for possible future rides. As luck would have it the camp is not open yet for the season.

On the way we passed this field full of...

...water buffalo!

We've seen them before while driving this road and I never had a camera with me or they were way off the road.

I could hardly believe it the first time I saw them but found this article about them on-line. Yesterday they were close to the corner by the road so I jumped out to get a picture. Unfortunately they were rather skittish and as soon as they saw me getting out of the truck they started scampering away.

We continued on our way and came to this rock formation. It's called Steins Pillar. The sign explains how it was formed. (Click on the pictures to enlarge.)

This was taken at the "view point". Next time we go this way I think we'll stop along the road because I think I could have taken a nicer picture.

The road loops through the national forest and we ended up back in Prineville on Main Street. When we got home I attempted to make "macarons". (Not macaroons.) I first saw them when Chuck Hughes made them on his show "Chuck's Day Off". I got the recipe off of the Cooking Channel website. They were very time consuming to make (I had to make my own almond powder for one thing...) Then there was the thing they forgot to mention in the recipe. The important thing like to line the baking sheets with parchment paper before piping the mixture on. Here's the first mention of a baking sheet:

Fit a piping bag with a 3/8-inch/1 cm round tip. Pipe the batter onto the baking sheets. Tap the underside of the baking sheet to remove air bubbles. Let dry at room temperature for 1 hour to allow skins to form.

Did you see any mention of parchment paper? I didn't. So I cooked them and then:


Remove the macarons from the oven and transfer parchment to a cooling rack.

Now it mentions parchment! So my macarons kind of stuck. I had to be very careful getting them off the pan. That's why they are all cracked. Then came the experience of attempting to make the butter cream. Well, let's just say it was a slight disaster that I fixed by adding a packet of instant vanilla pudding.

So my macarons weren't perfect but they didn't taste too bad. They are very rich and I may attempt them again some time in the distant future. But with a different recipe source.

Wednesday, April 25, 2012

Cherries Planted & Some Extra

We planted the final two fruit trees today.  This one is the Black Tartarian Cherry.
   
This is the Rainier Cherry.  I really hope these cherries grow well. Rainiers are like eating candy!
That leaves just the Sugar Maple left to plant.  I'm still not 100% sure where I want to put it.  The place I have in mind (where my trail splits at the loop) means I will probably have to put a deer protection fence around it until it gets big enough.  

And so it is still in the pot (in the background of the first picture) while I try to make up my mind.  That was the extent of our outside work today because it was significantly cooler and windier.

A good day to make bread!  (This is Farmhouse White Bread from the Farmgirl Fare blog.) 
And lest you think we're all work and no play here's Star and me out having a little fun last Sunday!

As I sit here writing this the clouds have opened and it is now pouring rain.  The weather looks to be improving by the weekend so we'll be able to get back outside soon.

Wednesday, February 15, 2012

Mini Cheesecake

As promised I have the recipe now for the mini cheesecake I made earlier. I didn't make a bunch of pictures this time, just a few of the finished product.
Mini Cheesecake

1 C graham cracker crumbs
3 T melted butter
2 T sugar
1 8 oz pkg softened cream cheese
1/4 C sugar
1 egg
1/2 C sour cream
zest of 1 orange
juice of 1 orange

Preheat oven to 350°.

Mix crumbs with butter and 2 T sugar. Press into botom and sides of 2 4" springform pans. Place in fridge while you make cheese mixture.

Mix cream cheese with 1/4 C sugar until light and fluffy. Add egg, sour cream, zest, and juice. Mix well. Divide between the springform pans.

Bake in oven for more or less 60 minutes. Don't let the top get too dark. Note: the cakes will puff up in the oven and then collapse as they cool. Let cool (preferably covered, overnight in the fridge).

Use your imagination to fill and serve. The first one I made had fresh fruit and whipped cream. This one I used frozen blueberries and strawberries and cooked them down with sugar, then added some gelatin. I added too much gelatin but the cake part was still good.


Thursday, January 19, 2012

Acorn Squash Soup

This soup is so delectably rich and delicious, yet it is so simple to make! I threw it together when we had an extra acorn squash that needed to be cooked.

The ingredients are 1 acorn squash, 1 C beef broth, 1 C heavy cream, 2 C milk.
First bake the squash. Cut it in half, clean out the seeds. Lightly oil or spray Pam on the exposed flesh and place face down on a baking sheet. Bake in a 350° oven for about 30 minutes or until the squash is tender.

When the squash is done you can either wrap it up and put it in the fridge to finish later or continue. Scoop out the flesh and place in a large bowl or pot.
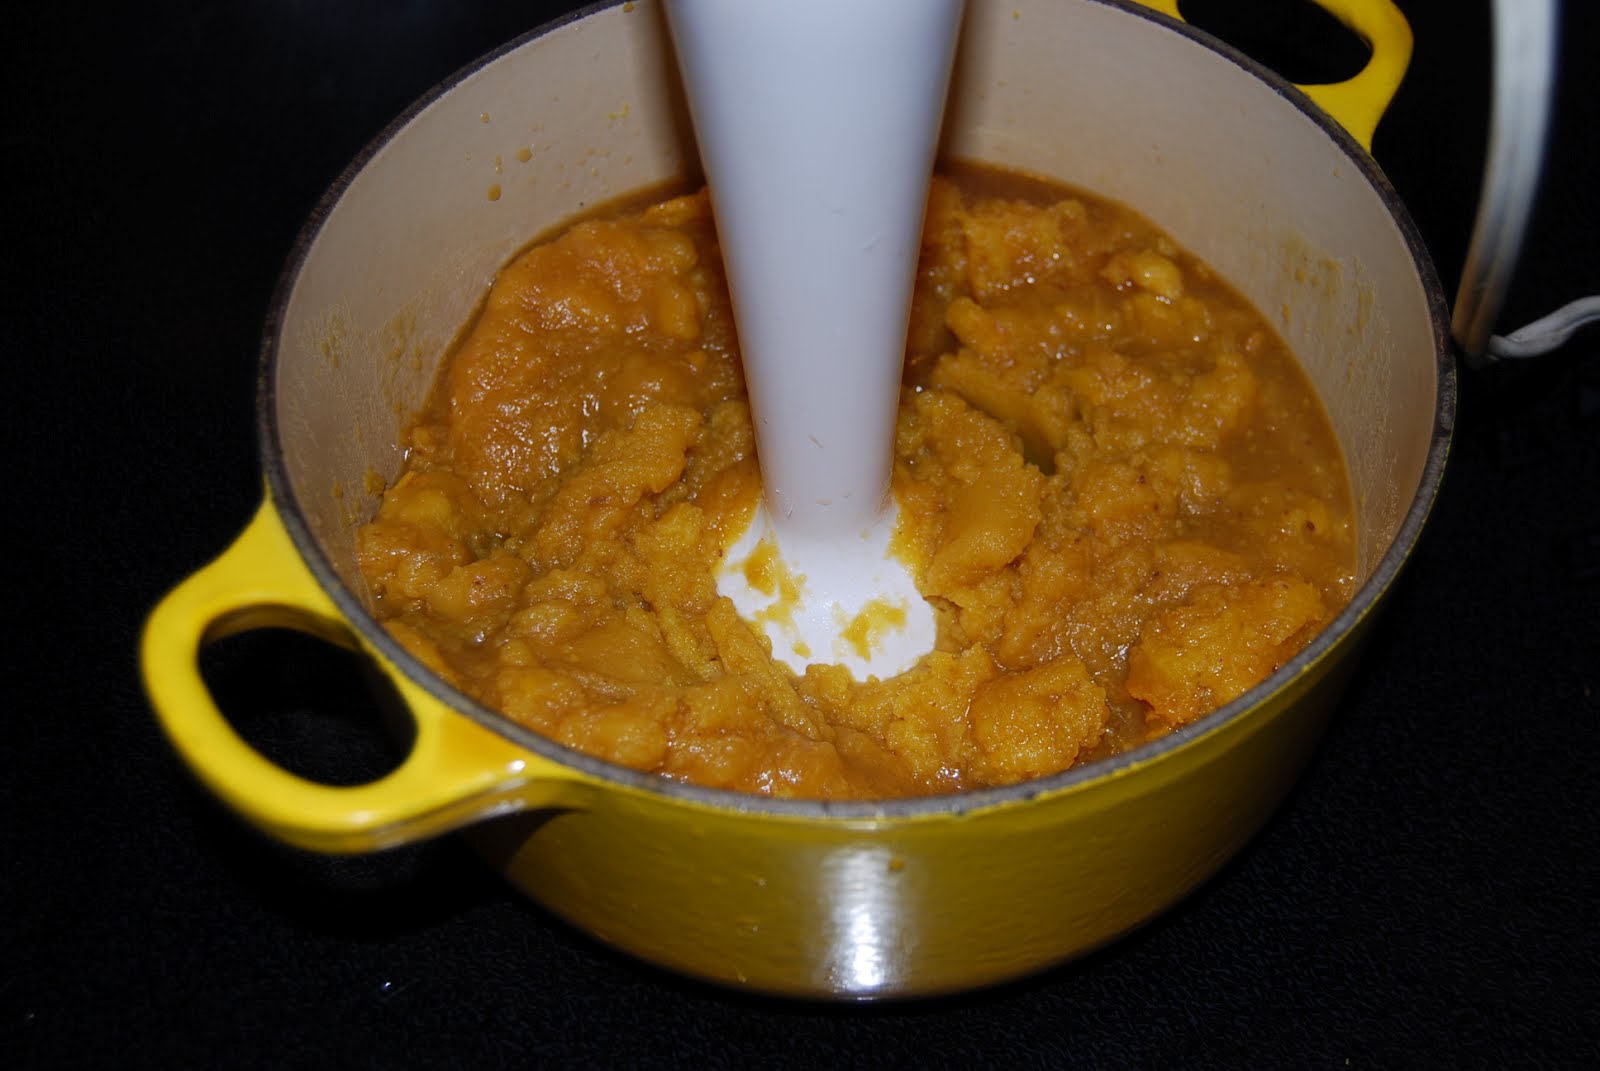
Add the broth and blend with stick blender until smooth.
Add the cream and blend until smooth.
Add the milk and blend...
Serve hot or cold (like a vichysoisse).
You could probably do this in a stand blender too if it has a big enough capacity. Notice the only fattening thing is the one cup of cream. There is no added butter or salt and in my opinion no need for it. The cream makes it very filling and rich so you don't need a whole lot. It makes a great appetizer or little snack. If you wanted to lighten it up you could probably substitute the cream with half and half and the milk with low fat milk. But really, why would you?

Enjoy!

Tuesday, January 17, 2012

Cat & A Cheesecake

Just to let you know, the cat and the cheesecake don't have anything to do with each other.

I took this picture of Ollie totally relaxed in front of the fire last night.
She was flat on her back and when I took this picture she glared at me like she wanted me to go away and let her bask in the warmth from the fire.
Yesterday I also made this mini cheesecake that we ate tonight.
It turned out better than I expected because I took a recipe and kind of divided it by four to have a small portion. We had one package of cream cheese, just a bit of sour cream, and some oranges and blueberries that had been in the fridge for a while. I wanted to do something with them before they went bad and I'm happy to say it was a success.
I will attempt to recreate this recipe (it made two mini cheesecakes) at a later time which I will record and if it turns out good again I will post it.

Sunday, December 25, 2011

Easy Apple Strudel

I remember my sister and I made a real apple strudel once, long, long ago. I don't remember how she did the dough but I do remember helping her stretch the dough over the kitchen table. Then she filled it and we both carefully rolled it up. When it was done it was delectable!

I've often thought about that time and making a strudel but the thought of making a flaky buttery dough scared me. I don't usually make a very good dough.

So you can imagine how happy I was when I found this recipe. I somehow got hooked up with an online subscription to "Recipe 4 Living" and get occasional emails that have tons of recipes. So here is their simple recipe for apple strudel.

Ingredients

  • 1 egg
  • 1 Tbsp. water
  • 2 Tbsp. granulated sugar
  • 1 Tbsp. all-purpose flour
  • 1/4 tsp. ground cinnamon
  • 2 lg. Granny Smith apples, peeled, cored and thinly sliced
  • 2 Tbsp. raisins
  • 1/2 of a 17.3-oz. package Pepperidge Farm® Puff Pastry Sheets (1 sheet), thawed
  • Confectioners' sugar (optional)
  • 1/4 c chopped pecans (*my addition)
Heat the oven to 375°. Beat the egg with the water, set aside.

Roll out the thawed dough into a 12" X 16" rectangle.
Peel and core the apples.
Slice the apples thinly.
Add sugar, flour, cinnamon, raisins, nuts. Toss to coat the apples.
Place the mixture on one half of the rolled out dough, leaving at least a one inch edge.
Roll it up, pinch the edges to seal and place seam down on a cooking sheet.
Make several slits along the top and cover with the egg wash.
Bake in the oven for about 35 minutes or until the pastry is golden brown.
Place on a rack to cool. Sprinkle with confectioners sugar if desired. (Why not?)
Slice and enjoy!
Serve it up warmish or at room temperature with ice cream or slightly sweetened whipped cream, or just plain! Also makes a great breakfast treat.

Enjoy!

(Click here to see the original recipe.)

Sunday, January 30, 2011

Oysters Casino

Here is one of the things we've done with the extremely fresh (just harvested) oysters we got from Winchester Bay the other day.
We made Tyler Florence's Oysters Casino. You can click on the link for the recipe.

First of all it was really easy.

Second of all it was really delicious!!

Friday, July 9, 2010

Put On A Happy Face

Do you ever have one of those dreams where you are running back and forth and just can't seem to get anything done? That's how I'm feeling lately in real life.

I know things are actually getting done but it just doesn't feel like it. The desk that I wanted to put in storage three weeks ago is still in the middle of the living room. And now it has a companion--my daughter's king size bed!

We took her bed out of the room and I got a daybed to put in its place. Wow, does the room look so much bigger now! I still have to paint the two kids' bedrooms but slowly but surely I'm making progress.

I managed to thoroughy clean the master bathroom walls, so I didn't have to repaint them. Hopefully the kitchen and front bathroom walls will clean up just as easily (it took just a bit of elbow grease--and lots of TSP).

The last three days I've been practically doing nothing but laundry, load after load! I finally got it all done yesterday.

Yesterday a glass guy came to give us an estimate on replacing the badly scratched sliding patio door and fix a bathroom window gasket. Today another glass guy is coming to see if we can get a better deal. For the price of the first one we could actually replace the slider with a whole new unit! Ha!

Meanwhile my husband has been doing lots of heavy duty outdoor work, like trimming the trees and that sort of thing. He's going to borrow a pressure washer this weekend.

Hopefully we'll be making a run to the storage facility this weekend.

I think I'll take a breather tonight with a little drinkie poo, after I do my running around today (got to get new bedding for my son's bed and the new daybed). I celebrated the 4th with a buttery nipple coctail, one of my favorites. I had to get the camera when I put the glass on the table and saw this!
(Buttery Nipple Coctail: equal parts Irish Cream and butterscotch schnapps. I usually prefer mine over ice, but other recipes say to float the cream over the schnapps.)

Tuesday, June 29, 2010

Tomato Tarts/Lemonade Pie

We subscribe to a great magazine called "Cuisine At Home". It is full of great hints, tips, suggestions, and best of all a lot of really great recipes that are delicious and easy to make. When I saw the Tomato Tarts in the August 2010 issue I knew I had to make them.
I'm not going to give the recipe here because I think you should subscribe to the magazine and mostly because I don't feel like it right now. (Sorry, but I'm tired from all this cleaning and painting, etc.) Basically it simply involves puff pastry, fresh tomatoes, fresh basil, herbed goat cheese (I used Rondele because I don't care a lot for goat cheese).
From the same issue I also made the Lemonade Pie.
This pie is an easy ice cream pie with a Nilla Wafer crust and a berry swirl on top.
Absolutely perfect for a hot summer day!
These were just two of the many easy and yummy recipes from one issue. If you're into cooking at all I really recommend this magazine. Maybe I'll share the recipes another time, but not right now...

Thursday, December 31, 2009

Duck And Garlic Stuffed Jalapenos


Here's a hors d'oevre (or as we like to say: horse diver) that is quick and easy to make. My husband has a hunting buddy who passed this on to him. He didn't write the recipe down so this is how he remembered it.

A day or two before you are going to make the peppers, marinate chunks of duck meat in your favorite teriyaki sauce. The meat should be cut to fit inside a jalapeno pepper.
Half and seed your jalapenos.
Saute garlic cloves in a little oil until they are lightly browned.
Drain on paper towels.
Everything is lined up and ready to start putting together.
Place the duck meat in one side of the jalapenos.
Place the garlic cloves in the other side.
Put the two halves together, wrap with a bacon strip and pin together with a toothpick.
Place the jalapenos on a baking rack.
Bake at 375〫for about 20 minutes or until the bacon is crisp.
Enjoy!